
Best Food For Boating – 6 Easy Recipes!

Best Food For Boating

Like an accessory or an outfit, food can be cooked to fit the occasion. Not everyone has the time or resources to prepare a five-course meal all the time, and this rule definitely applies to sailors. Still, just because you’re out on the open water with limited resources doesn’t mean your taste buds should have to suffer. Below is some of the best food for boating, and their easy-to-prepare recipes.


1#. TURKEY ROLL-UPS

Want to celebrate Thanksgiving all year long?

If so, these turkey roll-ups have it all–with turkey, cream cheese, and cranberry sauce, you can expect every bite to be packed with flavor.
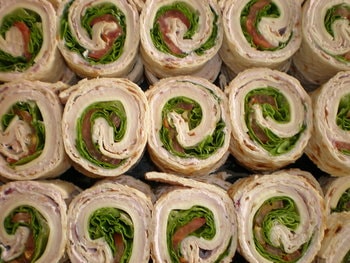
Roll up snack for boat trip

Check cookware for boats

All you need is:

Ingredients:

  • 8 ounces of cream cheese (softened)
  • 1/4 cup of cranberry sauce
  • 8 flour tortillas
  • half a head of romaine lettuce torn into 4-inch pieces
  • 16 slices of deli turkey
  • 16 slices of Swiss or Harvati cheese along with two sliced tomatoes.

Directions:

Once you’ve gathered your ingredients, the entire process will only take about thirty minutes before you can actually sit down and begin eating. For a quick, flavorful meal, turkey roll-ups are definitely the way to go.


2#. CHOPPED SALAD IN JARS

If you’re in the mood for something a bit healthier, the chopped salad in jars is both tasty and extremely convenient while boating. Unlike regular salads that are prepared in bowls, this one has very little chance of tipping over or spilling. The jar not only keeps it safe but also portable–wherever you go, your salad can go too. For anybody who likes their salads to not only be tasty but also presentable, the jar tends to give it a pleasant appearance as well.
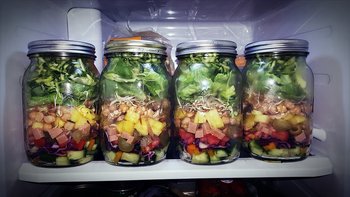
Salad in jars to eat for boat trip

Check cookware for boats

Directions:

There’s no exact recipe for making this one, and you can chop up whatever vegetables you have on hand. To save it for later, all you have to do is place the lid on the jar and close it. One little tip to add here is that if you plan on making this simple meal during the summer, chopped veggie salads will hold up better than lettuce-based ones under the hot sun, and a thin vinaigrette dressing will do much better than heavier salad dressings too.


3#. CUBAN SANDWICH

Craving a Cuban sandwich but just don’t have the time to make one? Or maybe you’re looking for more of a snack and less of a meal? Well, this Cuban sandwich works in both cases. The recipe is incredibly simple to remember: all you need are
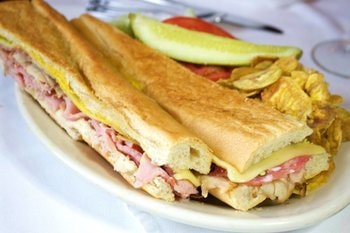
Cuban sandwich to eat for a boat trip

Check cookware for boats

Ingredients:

  • some toothpicks
  • dill pickles
  • ham
  • cheese.

Directions:

Just cut the pickles, ham, and cheese into bite-sized pieces and slide them on the sticks and that’s it–easy as pie. If you know you’re going to have multiple people around, these little Cuban sandwiches serve as a great appetizer as well.


4#. BLT SLIDERS

It doesn’t matter where you are or what you’re doing–BLT sliders are always an essential part of any meal. These tasty treats are both easy to make and universally delicious.  Here’s what you need:
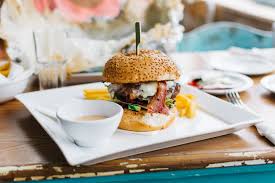
BLT Slider to eat for a boat trip

Check cookware for boats

Ingredients:

  • some good-quality bacon
  • a package of Hawaiian rolls
  • heirloom tomatoes that are relatively small
  • 3 tablespoons of mayo
  • chopped up basil and just a squeeze of lemon.

Directions:

Once you’ve assembled your ingredients, it’s as simple as cooking up the bacon and spreading your ingredients onto each roll. For best results, combining the mayo, lemon, and basil into one mixture makes it easier to apply on the sliders. In the summer, when the sun is blazing and the drinks are cold, this bite-sized meal is particularly appetizing.


5#. SAUSAGE EGG BOATS

What about breakfast though? After all, there’s got to be some boat-themed cuisines for the most important meal of the day, right? There is–sausage egg boats are the perfect way to start your day. The requirements for this one are:

Sausage egg for a boat trip

Check cookware for boats

Ingredients:

  • 4 sourdough baguettes
  • 1 (7 ounces) package of Jones All Natural Golden Spicy Pork Links
  • 3 green onions sliced thinly
  • half a cup of heavy cream or fat-free half-and-half
  • 8 eggs
  • 8 ounces of grated pepper jack cheese.

Directions:

Once you’ve prepared the sausage and chopped it into smaller pieces, you’ll want to mix the other ingredients in a bowl–starting with the eggs and cream–before adding it all in. In order to gain the boat shape of the bread, you’ll want to cut out the center of each baguette before pouring in the mixture and baking them for 25 minutes. After everything, you can expect about thirty minutes to prepare and cook this meal–which, considering the delicious payoff, isn’t bad at all.


6#. ZUCCHINI PIZZA BOATS

Following the “boat” theme, this next food is not only mouthwatering but also a healthier alternative to pizza. Just keep in mind that this recipe leaves you with about 6 servings, so it’s unlikely you’ll be able to eat it all yourself. First off, here’s what you need:

ZUCCHINI PIZZA BOATS for boating

Check cookware for boats

Ingredients:

  • 6 small zucchini
  • a minced clove of garlic
  • a tablespoon of olive oil
  • one cup of marinara sauce
  • 6 ounces of shredded mozzarella cheese
  • 1/3 of finely shredded Parmesan cheese
  • half a cup of mini pepperoni slices
  • Two tablespoons of freshly chopped oregano.

Directions:

Like the baguettes, the zucchini will have to be cut in half before you begin adding the marinara and mozzarella cheese. Keep in mind–not all these toppings have to be added to the dish. If you hate pepperoni and prefer sausage, feel free to substitute. Once you’ve added everything into the zucchini though, they have to bake for about 12-18 minutes. Despite the somewhat lengthier ingredient list though, this meal is hardly complicated and only takes about thirty minutes to prepare.


In Conclusion

Sailing, while incredibly fun and challenging, can sometimes come at the expense of good food as a result of limited resources. The truth is, however, your taste buds and stomach do not have to suffer–these six recipes above are perfect to prepare on the water. Some, like the Cuban sandwich or chopped salad in a cup, could probably be prepared in five minutes, while the zucchini pizza and sausage egg boats may require a little more concentration. Either way, you can expect to be pleasantly surprised with how each item on this list ends up turning out.

Want More Recipes? 

Subscribe to Cruising Sea newsletter to receive every two-week the latest post straight to your inbox

Do you know other tasty food to add to this list? If so, you are welcome to share them in the comment below.
Molokini and Turtle Arches Snorkeling – Guaranteed Fun!

If you’re planning to go on a holiday to Hawaii this season, then there can be no better
way of guaranteeing a fun-filled experience than taking a Molokini and Turtle
Arches snorkeling trip.

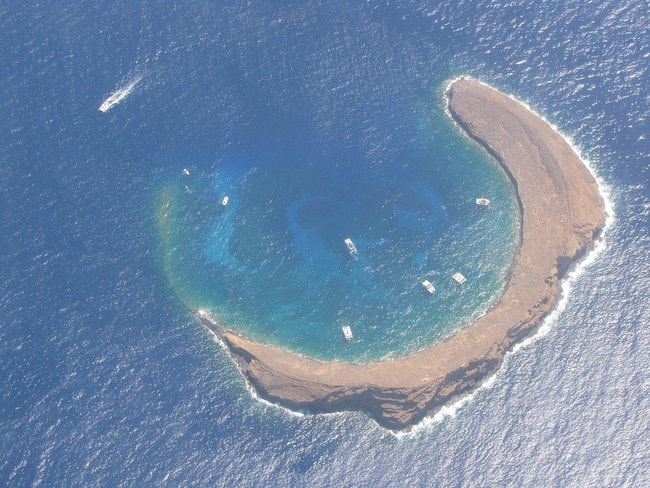
Endowed with crystal clear waters, abundant marine life, and flourishing corals, these two places provide a safe haven for snorkeling, diving and a host of other water-related activities.

To make your dream come true, all you need to do is get aboard the Ocean Odyssey for an unlimited snorkeling adventure into the waters of Maui.


What to Expect

Departure

To get started on your sea adventure, you’ll need to board the Ocean Odyssey at Ma’alaea Harbor.

The single-deck, smooth riding catamaran is customized with such features as gallery bar, two bathrooms, freshwater shower, water slide and snorkel steps for entering into and out of the water.

It also boasts of a professional crew that will provide you with the company and service you need throughout the trip.

On Board the Catamaran

While cruising to Molokini and Turtle Arches, the boat crew will delight you with amazing tropical-style continental breakfast featuring pastries, tropical fruits, juices and freshly brewed Maui coffee.

Along the way, you can listen to certified naturalists offer snorkeling classes to beginners as they also talk about the delicate ecology of this part of Hawaii. During winter, you might also be lucky to enjoy sightings of whales gliding through the waters.

Snorkeling Time

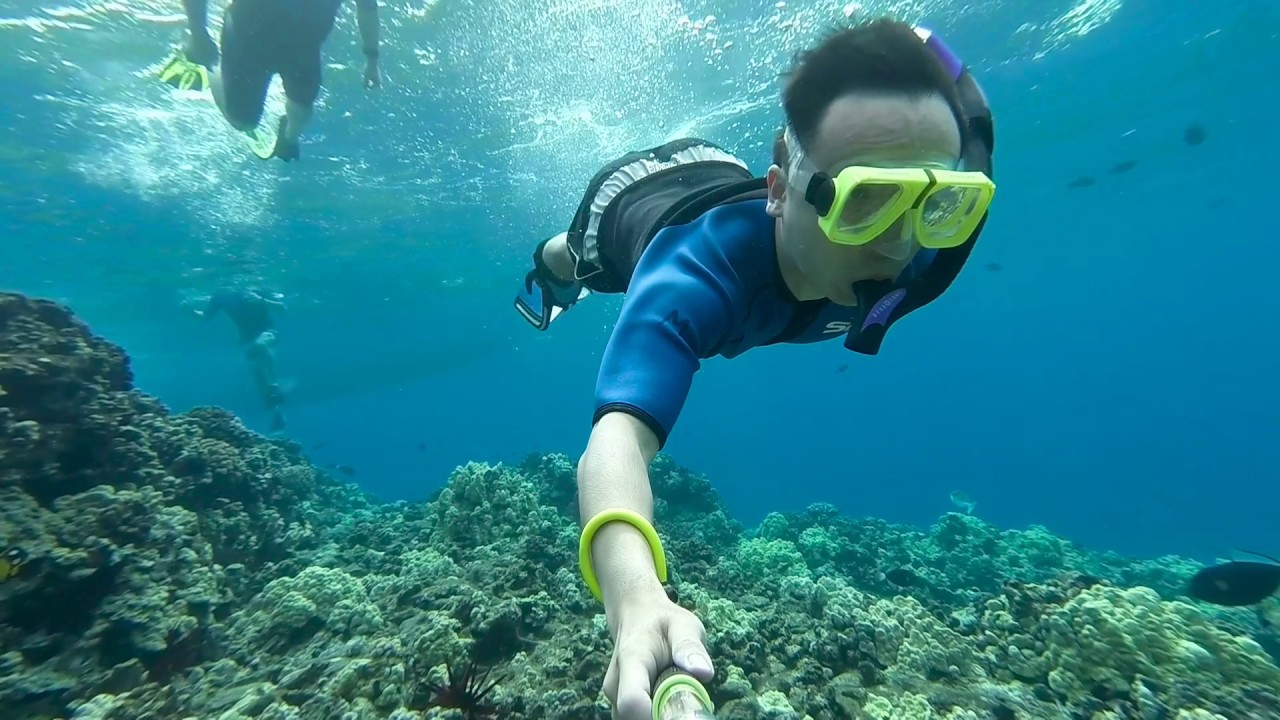
A visit to the crescent-shaped Molokini crater presents numerous opportunities for snorkelers and scuba divers alike. This extinct volcanic crater is home to more than 250 species of marine fish and 38 species of corals.

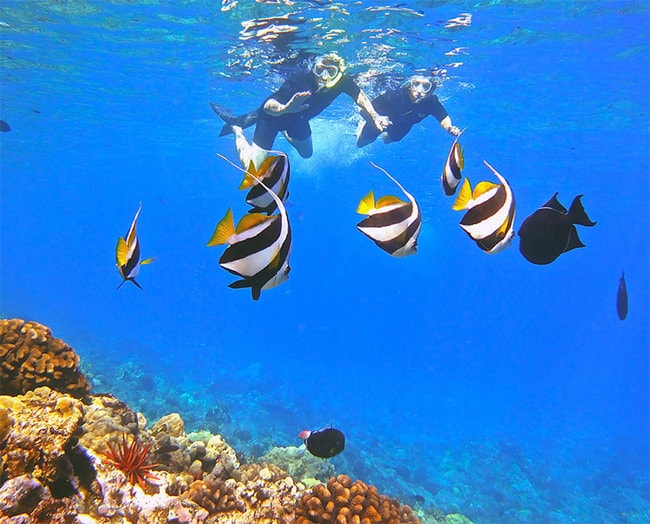
While underwater, you can encounter up close with exotic marine fish and creatures like parrot fish, reef sharks, manta rays, ornate octopus, triggerfish, white spotted puffer,
yellow tang, Moorish idol, Achilles tang and more.

That plus the colorful corals make for spectacular underwater scenery whose beauty is hard to beat.

Turtles Arches

Another amazing snorkeling spot in Maui is the Turtles Arches, a dazzling reef sitting off Maui’s South coast. The spot is popular for its underwater larva formations and abundance of green sea turtles.

Here, you can enjoy a free guided reef tour by a naturalist from the crew, who’ll help you learn and appreciate the ecology below the waves. You can also feel free to take photos of the graceful green sea turtles together with the spectacular larva arches, just to document your underwater encounters.

Back On Board

Upon returning aboard the boat, after a rather tiring snorkeling experience, you can
warm up the decks as you enjoy barbecue lunch with grilled teriyaki chicken,
hot dogs, veggie burgers, potato salad, chocolate chip cookies and more. All
these foods are served with perfect dressings and condiments that will make you
savor every mouthful.

There’s also plenty of water, juices, and sodas that can go along well with the foods served.
And if you are an adult aged 21 years and above with a valid ID, you may be served with complimentary alcoholic beverages like beer, wine and Mai Tais from Maui Brewing Company. You can enjoy other additional alcoholic drinks, blended cocktails, and refills but at a reasonable price.


What Is The Duration Of The Tour?

The tour to Molokini and Turtle Arches is usually scheduled for 5 hours. You can spend
nearly half of the time on each of the two snorkeling sites. The check-in time
is set at 45 minutes prior to the departure. If you wish to enjoy a more
personalized tour (with your desired time), then you can contact the catamaran
company to organize for a private charter at a given price.


When Is The Best Time To Do The Tour?

Any time of the day can be a good time to visit Molokini and Turtle Arches. However, it can
be fun to go on the tour early in the morning ( the first departure at 7 am) before
it gets busy. That way you can enjoy the underwater world while it is in its
pristine condition.

Winter can also be the best time of the year to visit Molokini Crater because
it’s usually the whale season. During this time, Humpback whales migrate from
the North Pacific to Hawaii.

A larger percentage of the whales come specifically to Maui mate and give birth. So this is a perfect time for you to catch the magnificent sightings of the Humpback whales.


What Amenities Are There On Board?

The Ocean Odyssey is the ultimate definition of comfort, luxury, and convenience. Some of
the notable amenities you can find on board include warm showers, super water
slide, glass bottom viewing window and swim steps. With such great amenities,
you can be sure of enjoying a fun-filled experience both on board and in the
waters.


Things Included In the Tour Package

  • Professional crew and certified naturalists onboard
  • Snorkeling equipment including optical masks
  • Flotation devices and snorkel instructions
  • Visit two snorkel sites
  • Onboard naturalists program for kids
  • Continental breakfast: assorted pastries, banana bread, veggie & potato salads, juice,
    fresh island and Maui coffee
  • BBQ lunch: grilled chicken, hot dogs, garden burgers, veggie salad, chocolate chip
    cookies, potato salad
  • Refreshments: soda, juice and complimentary alcoholic drinks (exclusively for persons aged 21 years and above). Additional alcoholic beverages and refills are available for
    purchase.


Things Excluded In the Tour Package

  • Wetsuit shirts, binoculars and underwater cameras (only available for rental)
  • Reef safe sunscreen bottles
  • SNUBA for children (available for hire or at an additional charge)

Molokini and Turtle Arches Snorkeling


Who’s The Tour For?

This tour is for anyone who wants to escape the hustle and bustle of the city
and enjoy complete fun in a serene environment. Both adults and kids (above 8
years) can go a snorkeling trip with the Ocean Odyssey for a fun-filled
adventure into the deep. You’re free to go on the tour with family, friends
and/or colleagues. The holiday experience just never gets better on this part
of Hawaii.


Why Should You Go this Tour?

A visit to Molokini and Turtle Arches presents a wonderful opportunity to sit back and enjoy nature’s beauty and tranquility. Apart from having lots of fun at sea, you’ll also get to
learn more about Hawaii’s reefs, fishes and other marine creatures in greater
detail. Visiting Maui with your loved ones or colleagues also offers an
opportunity for bonding and/or team building. These are reasons enough to get
you started on planning your next trip to Maui’s Molokini and Turtle Arches.


Pros

  • Sumptuous breakfast and lunch served on board
  • Drinks and refreshments included in the package
  • 5 hours of unlimited snorkeling adventure
  • Snorkeling gear provided free of charge
  • More than 250 species of fish to explore at sea

Cons

  • Packages don’t include hotel pick up and drop off services
  • Those booking snorkeling tours between September and November may not enjoy free alcoholic beverages
  • Snorkeling tours may sometimes be canceled due to bad weather

In Conclusion

Now that you know everything about the Molokini & Turtle Arches tour with Ocean Odyssey, you can go ahead and plan for a trip to Maui. Be sure to contact the catamaran company to make inquiries about the rates per tour (either for regular tours or private charters). If you can properly plan ahead, then you can be sure of enjoying a fun-filled and memorable holiday experience on the Maui waters.

# Find Out More About  The Tour

Have you already been on the Molokini and Turtle Arches Tour? If so, you are welcome to share your experience in the comment below.

SealLine Baja Dry Bag Review – Built To Last!

Have you already heard about the Sealline Brand?

You probably have because they are renown for being one of the most popular dry bags on the market!

All of their products are made in the US with their own RF welding machines by paddlers, surfers, and engineers who have only one thing in mind: make the best dry bags for your adventures!

Sealine dry bags are ultra-durable, waterproof, and super lightweight. In other words, bags you can count on to protect all your valuables no matter where you go and in any weather condition. Here is the SealLine Baja Dry Bag review.


What Is The Sealine Baja Dry Bag?

The Sealine Baja is a durable bag that features a roll-down closure, providing an excellent watertight seal. Once the bag is closed, no air no water can get inside or outside of the bag. So you can be sure your stuff will be well protected! Thanks to its stiff material, it will serve you for years to come!


Sealine Baja Features

Material

The bag is made of 19 oz scrim-reinforced vinyl and the bottom of heavy duty 30 oz scrim-reinforced vinyl. Meaning – the bag is built with two layers of high strength vinyl film, then laminated with an extra layer of molten vinyl. In other words, the bag provides a high level of tear resistance, durability, and waterproofness.

Closure System

Like many other dry bags in similar models, it closes with a roll-top closure. This means you have to roll down the top a few times and then close it with the two buckles placed at each extremity of the closure. Not only does it create a great seal to keep all the content safe, but also allows you to access your content easily.

Lashing Points

On one side of the bag, there is a D-ring that allows you to attach it to a boat, canoe, kayak, or to any vehicle you wish. The only inconvenience with the Baja is that it doesn’t feature any straps or loops. Fortunately, the bag can be easily used via its carrying handle created by the buckled seal.


Size: The Baja is available in 8 sizes: 5L, 10L, 20L, 30L, 40L, 50L, and 55L.
 
Storage Capability

If you pick a larger size, you can always roll it down to a smaller capacity. But if you choose a bag that is too small, you won’t have the possibility to make it bigger. So don’t worry if the bag you opt for is a bit larger than you expected!

Let’s see what each of them can approximately hold.

5L: Small items such as wallet, iPhone, camera, etc..
10L: Clothing for one day out
30L: Clothing for a weekend trip
40L: Clothing for a three-day trip.
50L: Clothing for a week trip
55L: Clothing for more than a week trip

Colors

The Baja comes in 7 different colors. Black, olive, red, yellow, blue, green, orange. The brightest allow spotting the bag quickly in the dark or from a great distance.

Warranty

Sealine Company offers a lifetime guarantee for the Baja, giving you plenty of time!


Is The Sealine Baja Submersible?

This bag is not designed to be submerged underwater for a long time. However, if it falls overboard, the bag will float, and all the content will remain dry if, and only if, the bag is well secured. For some peace of mind, you can try to submerge the bag filled with paper first in the bath and see if it works. Just make sure before to check if there isn’t any defect or a hole in the bag. You never know!


Where Can You Use The Sealine Baja

You can use it wherever you want, but since it doesn’t feature any strap, it will be difficult to carry it while hiking unless you store it in a larger bag or attach it with a rope. The only way you can carry this bag is with its handle created by the roll-down closure. What you can do, though, is slip on a strap through the D-ring and the handle so you can transport it more easily.


How To Seal The Sealine Baja?

Put all your gear in the Baja and leave at least 3 inches below the black bands empty so you can secure the bag properly. Once everything is in place, close the bag using the two edges and roll the top down by pressing the bag to get the air out. Tight it as much as possible and clip the two buckles. And voila, your dry bag is ready to go on your excursion!


How To Care For The Bag?

Since the Baja material is stiff, it is not possible to put it in the washing machine. So the surer way to maintain the bag is to clean it with a rag and gentle soap. When you’ve finished with the soap, rinse it with clear water. It is imperative to air out the bag after each use to prevent any unpleasant odor.


Who Is The Sealine Baja For?

The Baja is for anyone who practices water sports such as kayaking, canoes, rafting, boating, and snorkeling to name a few. This bag can also be used for camping as well as for biking and motorcycle rides. It is not a bag though you can carry comfortably for hiking or traveling as it doesn’t feature any strap to hold it.


Should You Buy The Baja?

If you are an avid watersport lover, then yes, you should definitely get the Baja! Here are the reasons why: It is made of vinyl material, which makes this bag exceptionally durable. Another good thing about it is that it has a high level of waterproofness, so if your bag gets wet, you can be sure your gear will remain dry. Also, It is remarkably versatile. You can use it as a pillow as well as a cooler or a floating device.


Pros

  • Stiff material, resistant to tears.
  • Waterproof, keep everything dry.
  • Easy to open and close
  • Spacious, can store plenty of gear in the bigger sizes.
  • Folds up very easily

Cons

  • The bag doesn’t feature any straps or loops.
  • The bag has only one D-ring.

Sizes & Weight

5L 7″x8″ (weighs 7 oz -)
10L 8″x14″ (weighs 11 oz)
20L 9″x16″ (weighs 14.5 oz)
30L 11″x19″ (weighs 1 lb. 4 oz)
40L 13″x20″ (weighs 1 lb. 8 oz)
55L 13″x25″ (weighs 1 lb. 12 oz)


In Conclusion

Sturdy, lightweight, spacious, and waterproof, these are the most exceptional Baja’s dry bag qualities! What else could you possibly need to protect your stuff from the water? Yes, maybe a strap and more loops 🙂

What about you? Have you already tried the Sealine Baja bag? If so, what do you think about it? 


AMAZON AFFILIATE DISCLOSURE
Cruising Sea is a participant in the Amazon Services LLC Associates Program, an affiliate advertising program designed to provide a means for sites to earn advertising fees by advertising and linking to Amazon.com

Molokini Snorkeling Adventure Aboard The Calypso – A Sense Of Excitement!

Enjoy the best of holiday experience in Hawaii by taking a tour to the iconic Molokini Crater, a volcanic islet located just 3 miles off Maui’s south shore.

Going on a Molokini snorkeling adventure aboard the Calypso is one
of the surest ways of enjoying a fun and memorable holiday in the area. The
Calypso is a brand new power catamaran that offers visitors numerous
opportunities to explore the wonders of the South Maui coastline.

The Molokini Crater is surrounded by crystal clear waters that are home to more than 200 species of fish. That makes it an ideal spot for both snorkeling and diving.


What Can You Expect On A Snorkeling Tour?

Your snorkeling tour and ocean excursion can no doubt be exciting
with Calypso’s friendly crew on board. The boat departs from Maalaea Harbor-the
island’s centralized and easily accessible harbor. The Calypso usually heads to
two amazing places for excursions namely: Molokini and Turtle Town.


Onboard Experience

While aboard the Calypso for a morning snorkeling tour,
you’ll be served with donuts, eggs, cinnamon rolls, ham, fruits, juice and
more. The motorized catamaran features 3 spacious decks, easy-access points to
and from the water as well as professional captain and crew.

It is also designed with aquarium-style glass bottom windows that allow those on board to sit down and explore the reef without dipping even a toe on the ocean. The Calypso is simply a comfortable vessel for both landlubbers and ocean adventurers to ride in.


Molokini Crater

The extinct Molokini cone islet sits off the shore of Kihei
and rises out of 300 feet of water. Endowed with pristine waters and abundant
marine life, this area is an ideal spot for snorkeling.

Here, you can venture deep into the waters and experience first-hand Hawaiian native marine species like fish, manta rays, urchins, sharks, whales and more. The conditions and
the environment in this area is almost untouched, based on the fact that Molokini is
a preserved marine and bird sanctuary.

The underwater visibility at Molokini can sometimes go up 100 feet, something that can guarantee you having unlimited snorkeling adventure.


Turtle Town

Turtle Town is another prime snorkeling area in Maui that
you should visit after Molokini. Here, you have the opportunity to swim
alongside the Hawaiian green turtles.

With calm waters and thriving corals, you can for sure enjoy the spectacular underwater scenery. The sea turtles usually spend a lot of time in these waters nesting, interacting with fish and gliding around. You can always feel free to take photos while snorkeling in Turtle Town, just to document your underwater adventures.


After Snorkeling Tour Experience

Once you’re done snorkeling either in Molokini or Turtle
Town, you can return to the boat to relax and/or enjoy some barbecue lunch. The
Calypso usually serves buffet-style foods with great options like chicken, pulled
pork, sandwiches, chip cookies and pasta salad.

There’s also a trivia game(Quicksilver) that you can play on board and stand a chance of winning a crew t-shirt. While all this is going on, you can enjoy Jimmy Buffet music that’s playing in the background.


What’s The Duration of the Tour?

The Calypso snorkeling tours to both Molokini and Turtle
town are usually scheduled for 1.5 hours. During this time, you can enjoy sightseeing,
snorkeling, relaxing on the boat and/or taking photos. If you’re organizing for
a special occasion, you can pay for a private charter that will schedule the
tour time based on your specifications.


What’s The Best Time to Do the Tour?

Any time of the year is perfect for snorkeling around Molokini
and Turtle Town. However, if you’re crazy about swimming with the dolphins,
then the best season to visit Maui is between Mid-December and Mi-April. During
this time, there are plenty of humpback whales weighing up to 45 tons, whose sight
can be great to behold.


Mokoni snorkeling tour onboard the Calypso


Things Included In the Tour Package

  • 3-deck catamaran boat with sufficient seating
  • Professional captain and crew
  • 11 individual dive steps for easy access into and out of
    the water
  • 2 water slides
  • Flotation devices and safety accessories
  • Glass-bottom viewing room
  • Ham/egg breakfast, donuts, cinnamon rolls, fresh fruits,
    coffee and juice
  • BBQ lunch with pulled pork, chicken and vegetarian main
    course
  • 2 freshwater showers
  • 3 restrooms
  • Informative and historical narration
  • Onboard music with plenty of Jimmy Buffet music

Things Not Included In the Package

  • On-board SNUBA option available for guests aged 8 years and
    above
  • Alcoholic drinks
  • Gratuities
  • Hotel pickup and drop-off
  • Wetsuit and underwater digital camera (only available for
    rental)


Are There Any Extra Costs Charged?

In most cases, the cost of the Calypso snorkeling tour is
usually fixed based on the destination(s) you’re headed to. You can enjoy free meals
(for breakfast and lunch), accessories and other amenities provided on board. However,
you can choose to spend extra money on alcoholic drinks, SNUBA service, wetsuits
and camera hire. For private charters, you might be required to pay extra
charges depending on the type of occasion you’re scheduled to go for and the
time you’ll spend at sea.


Who’s The Tour For?

The Calypso snorkeling tour is ideal for the family and people
of all ages who want to enjoy the beautiful ocean scenery and/or explore the
underwater world. Children aged 8 years and older are welcome to enjoy SNUBA Dive.
This option provides kids with special equipment that allows them to snorkel and
breathe with ease while underwater. That means you can get everyone onboard
while going for a snorkeling tour with the Calypso.

#Click Here To Find Out More!


Why You Should Go For the Tour

The Calypso snorkeling tour provides you with once-in-a-lifetime
opportunity to get away from the noise of the city and unwind, in an otherwise
remote setting. Whether you’re looking for an ideal summer spot to relax or a
perfect team building setting, the Molokini, and Turtle Town never disappoint. And
Calypso offers you the best option to spice up your snorkeling tour even the
more.


What Should You Bring?

  •  seasickness bands

 Pros

  • Knowledgeable and helpful crew
  • Delicious breakfast and lunch
  • Spacious and comfortable catamaran
  • Snorkeling Gear and flotation device provided
  • Plenty of beautiful fishes and turtle to see

Cons

  • Hard to get to know each other as the boat is crowded with people.
  • Need to pay for the parking

In Conclusion

Maui is no doubt a paradise for snorkelers and casual
holidaymakers alike. And in order to enjoy a rewarding and memorable
experience, you need an experienced tour company to guide you around.

The Calypso snorkeling tour is the best tour service you can use on this part
of the Island. So if you’re planning to visit Maui this coming summer or holiday, be sure to organize your tour with the Calypso.


#Click Here To Book Your Tour 


Have you already been on the Molokini snorkeling tour aboard the Calypso?If so, you are welcome to share your experience in the comments below.


How To Choose The Best Dry Bag – Your Complete Guide!

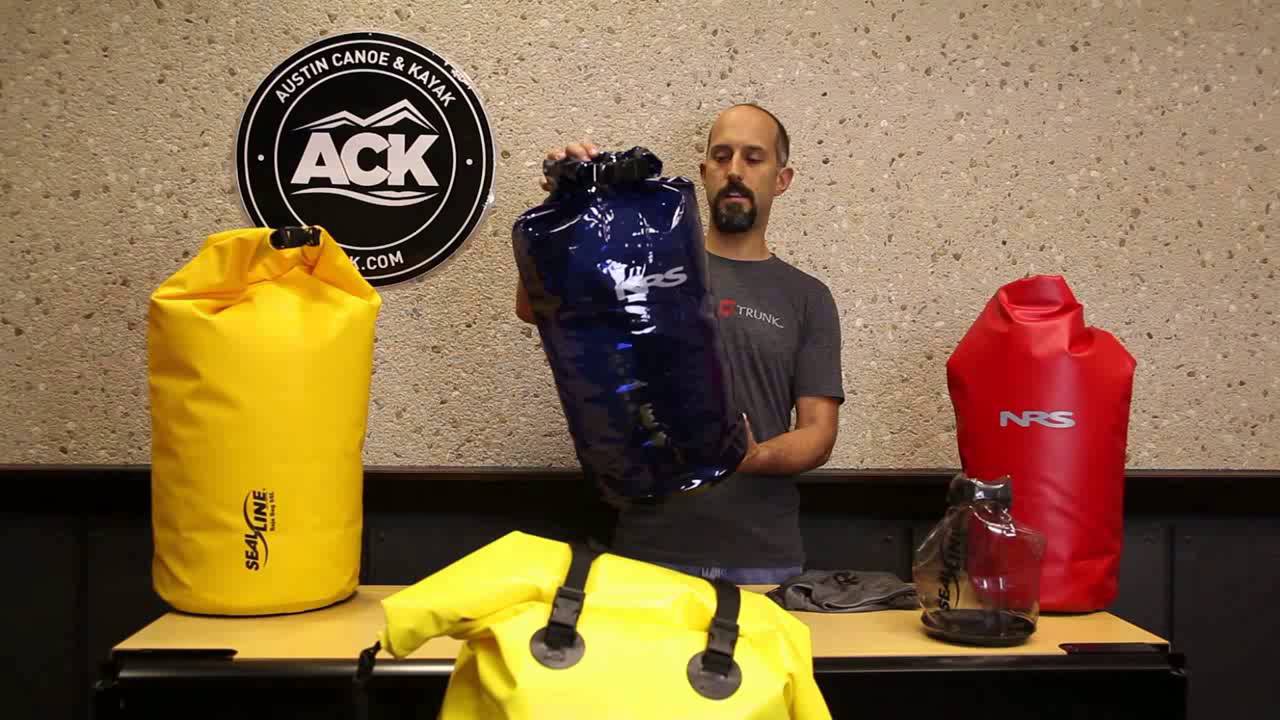
Guide to choosing the best dry bags

What material? What size? What closure type? These are probably the questions you ask yourself when you look for a high-quality dry bag, which is understandable. After all, you want to keep all your content dry and safe during your expedition. However, there are many different types of dry bags on the market, and with so many choices, it can become overwhelming! So it is essential that you know how to choose the best dry bag; that way, you’ll be able to enjoy your adventure thoroughly!


What Is A Dry Bag?

Dry bags are flexible and durable bags that keep all contents dry when doing outdoor activities. They are also used to protect electronic items such as Cellphone, cameras, and GPS devices from water as well as prevent your clothing from getting wet. It is essential to use a dry bag on any water excursion since it preserves all your gear from water, dirt, and sand!


What Material To Choose?

The first thing you should consider when choosing a dry bag is material since this is what will protect your gear. Dry bags are made either from nylon or vinyl. These materials were selected because of their high level of waterproofness and durability.

Vinyl: Vinyl is a material that is mostly used in dry bag construction. These are of high quality but are less flexible and heavier than bags made of nylon. Also, Vinyl bags are durable and resistant to all types of abuse. So if you are looking for a robust dry bag that can hold heavy equipment, then the vinyl will be a perfect choice.

Nylon: Many dry bags are made from nylon material and coated with PVC film or with a silicone coating agent, making them waterproof. These are slightly lighter and more flexible than vinyl bags. Unlike vinyl bags, these are more subject to mildew, tears, and punctures.


What Size Should You Choose?

Dry bags come in different sizes, and the most common size on the market are S, M. L, XL.

Let’s see what each of these can hold.

Small: Obviously, small bags are ideal to store small things like your wallet, camera, and iPod, to name a few. Usually, small bags range from 1L to 10L; some possess a single non-padded strap, while others don’t feature any. The small bags are great for separating dirty and clean laundry and also for storing in bigger bags.

Medium: The medium bags usually range from 10L to 20L and are suitable for storing bigger gear such as clothes, towels, etc.. These are great for a day or a weekend out!

Large: Large dry bags are for longer trips as these can hold a wider amount of gear. These range from 30L to 40L; some of them feature two straps and can be carried as a backpack. These are hugely appreciated by motorcycles because they are not too big or too small and are easy to attach.

Extra Large: These dry bag sizes are from 40L, and most of them feature two straps for more comfort. Of course, these volumes can hold a lot of gear and are perfect for trips that last a minimum a week.


Attachment Points

Usually, dry bags feature a D-ring to attach the bag to a vehicle such as a kayak, a boat or a motorcycle. But most of them can be attached with the help of the straps and end handle.


What Closure System?

Dry bags feature several different closure systems to prevent water from getting inside. All of them are excellent, but each closure type has its own pluses and minuses.

Zipper: Some dry bags feature a metal zipper, which allows getting to your content quickly. But the problem with the zipper closure is that stuff often gets stuck in it and doesn’t always work smoothly, which can become annoying after a while. Also, not all zippers are waterproof, and this could be a problem if the bag gets wet.

Drawstring: Drawstring closure is different than the roll top and is extremely easy to use. These are great for stowing away personal stuff but will not protect your content entirely from the water.

Velcro: Today, many manufacturers make dry bags with velcro on the top edge for better water protection. The velcro closure is very easy to use and comfortable. It secures the bag remarkably well!

Roll Down: Roll-down bags are fantastic for keeping the water out by rolling the top a few times and then securing it with the help of two buckles, which create a great seal.


How To Properly Seal A Roll Top Dry Bag?

1. Fill out the bag 3/4 with gear
2. Close the two edges together.
3. Roll the top three to four times
4. Join the two buckles and secure them.


What Is The Difference Between A Dry Bag & A Dry Sack?

Dry bags are made from stiff materials that have a high level of waterproofness and are durable. These are mainly used for watersports as well as for outdoor activities.

Dry Sacks are made from ultra-lightweight materials and are usually meant to be stored in larger bags. These are mostly used for camping or outdoor activities.


What To Consider When Looking For A Dry Bag?

As mentioned above, there are many types of dry bags, and choosing the one that suits you best might not be easy if you don’t know what characteristics to look for. There are six important details you should consider when you pick the bag.

1) Of course, the best dry bags are the ones that have a high level of waterproofness. With these, you can be sure all your content will remain dry. So you should always check if the bag is waterproof.

2) It won’t be fun if your bag tears in the middle of your excursion. So it is essential to choose a bag that is made of a thick material such as vinyl, which is exceptionally durable. Although nylon material is thinner and lighter, it can suit fantastically for outdoor activities as well.

3) Color is a feature not to overlook when choosing a dry bag because it can make your life easier when it comes to spotting your bag in the dark or from afar. So remember, the brighter, the better!

4) Today many dry bags feature a transparent window that allows you to see your content through. It’s a great option, and it will help you search for things quickly, but it doesn’t make the bag of higher quality. It is just a plus!

5) If the bag features a zipper, make sure it is waterproof so water won’t get through it. The same for the ring; check if it is made of good plastic quality.

6) Straps are crucial when choosing a dry bag. It’s always useful to have a bag that you can carry from one place to another. If it’s a small or medium bag, then one strap will be more than enough. But if the bag is large, it should feature two straps so you can wear it as a backpack.


What Else Can You Do With A Dry Bag?

There are many things you can do with your dry bag other than outdoor activities. It might surprise you, but Yes, you can get the most out of your bag during your trip! Here are several things you can do with it.

1. You can use it as a cooler or as a Water Bucket
2. Since dry bags float on the water, you can use them as a flotation device.
3. It’s always useful to have something where you can lay your head, and that’s when the dry bag comes into play; you can use it as a pillow!


Who Is The Dry Bag For?

Without a doubt, for everyone! Dry bags can be used for any purpose. Whether it is to go on a sailing trip, rafting excursion, or hiking adventure, one thing is for sure; they will make your expedition more pleasant than ever. With dry bags, you can go wherever you wish in any weather condition without worrying your stuff will get wet.


How To Maintain Your Dry Bag?

Cleaning your dry bag will increase its lifespan. So how do you care for your dry bag? It’s easy! You just need to clean it with a non-detergent soap and rinse it with fresh water. Also, it is essential to air out the bag after each use. If you clean the interior as well, make sure to reverse it so it can dry thoroughly.


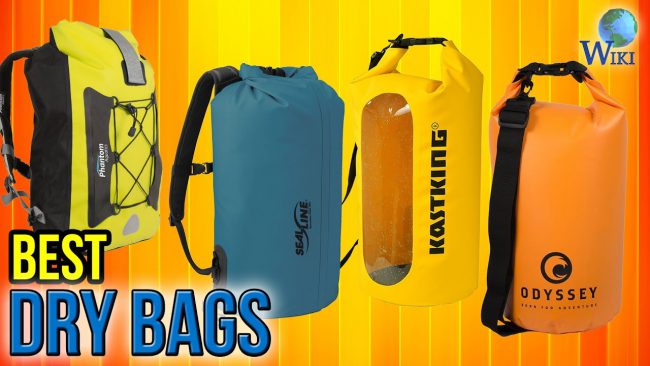
What Are The Best Dry Bags?

The dry bags that are listed below are the most popular that you can find on the market today!


In Conclusion

A good dry bag will protect all your gear from water and will make your adventure more pleasant since you don’t have to worry about your stuff getting wet! With the help of this guide, you should manage to choose the best dry bag for your next outdoor excursion! So go ahead and have fun!

Want More Tips? 

Subscribe to Cruising Sea newsletter to receive every two-week the latest post straight to your inbox